Before you begin to create your dashboard, verify that you are signed in to your organization with privileges to create content.
To create a dashboard, complete the following steps:
- Click the Apps button
 in the header of your site and click Dashboards.
 - Click Create Dashboard.
- Provide a title for your dashboard.
- Optionally, specify search tags, a summary, and a target folder.
- Click Create Dashboard.
Add elements
Once you have created your dashboard, you will need to add elements to begin creating visualizations.
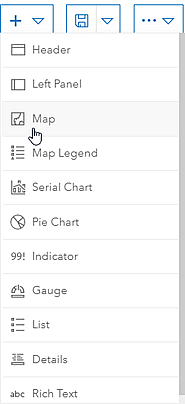
To add an element to your dashboard, click
Add  and choose an element from the menu, such as Map
  .
. 
Tip:
Consider adding one or more map elements to your dashboard first, because a web map's operational layers can serve as the data sources for other elements.
After you add an element to a dashboard, hover over the upper corner of the element to display the menu. You can access all of an element's settings through this menu. The buttons on the menu are as follows, from top to bottom:
- Drag item

- Configure element

- Duplicate element

- Delete element

Dashboards can also be created from Map Viewer, the gallery, content page, or item page in your organization. For more information, see Create apps from maps.